OriginCoder Quick Start: Create a Key and Connect Claude Code with CC Switch
Published 2026-11-11
This guide takes you from zero to a working setup: create an API key on OriginCoder, then use it in a third-party tool or in Claude Code. The easiest route is one-click import with CC Switch, which means you never edit a config file by hand. If you prefer to configure things manually, just put the Base URL and key into the tool's own settings.
Overview
- Create an API key.
- Fill in the key details.
- Enter the Base URL and API key in your third-party tool (or skip this and use CC Switch).
- Download and install CC Switch.
- Import the OriginCoder profile into CC Switch.
- Enable the profile and restart Claude Code.
Two addresses you will use, so note them now:
| Used for | Address |
|---|---|
| Claude (Claude Code and other tools that speak the Anthropic protocol) | https://origincoder.com |
| GPT (Codex and other tools that speak the OpenAI protocol) | https://origincoder.com/v1 |
The Claude address must not end in /v1; the GPT address must. The reasons are covered in How to use Claude Code with a custom API endpoint and How to use Codex CLI with a custom API endpoint.
Step 1: create an API key
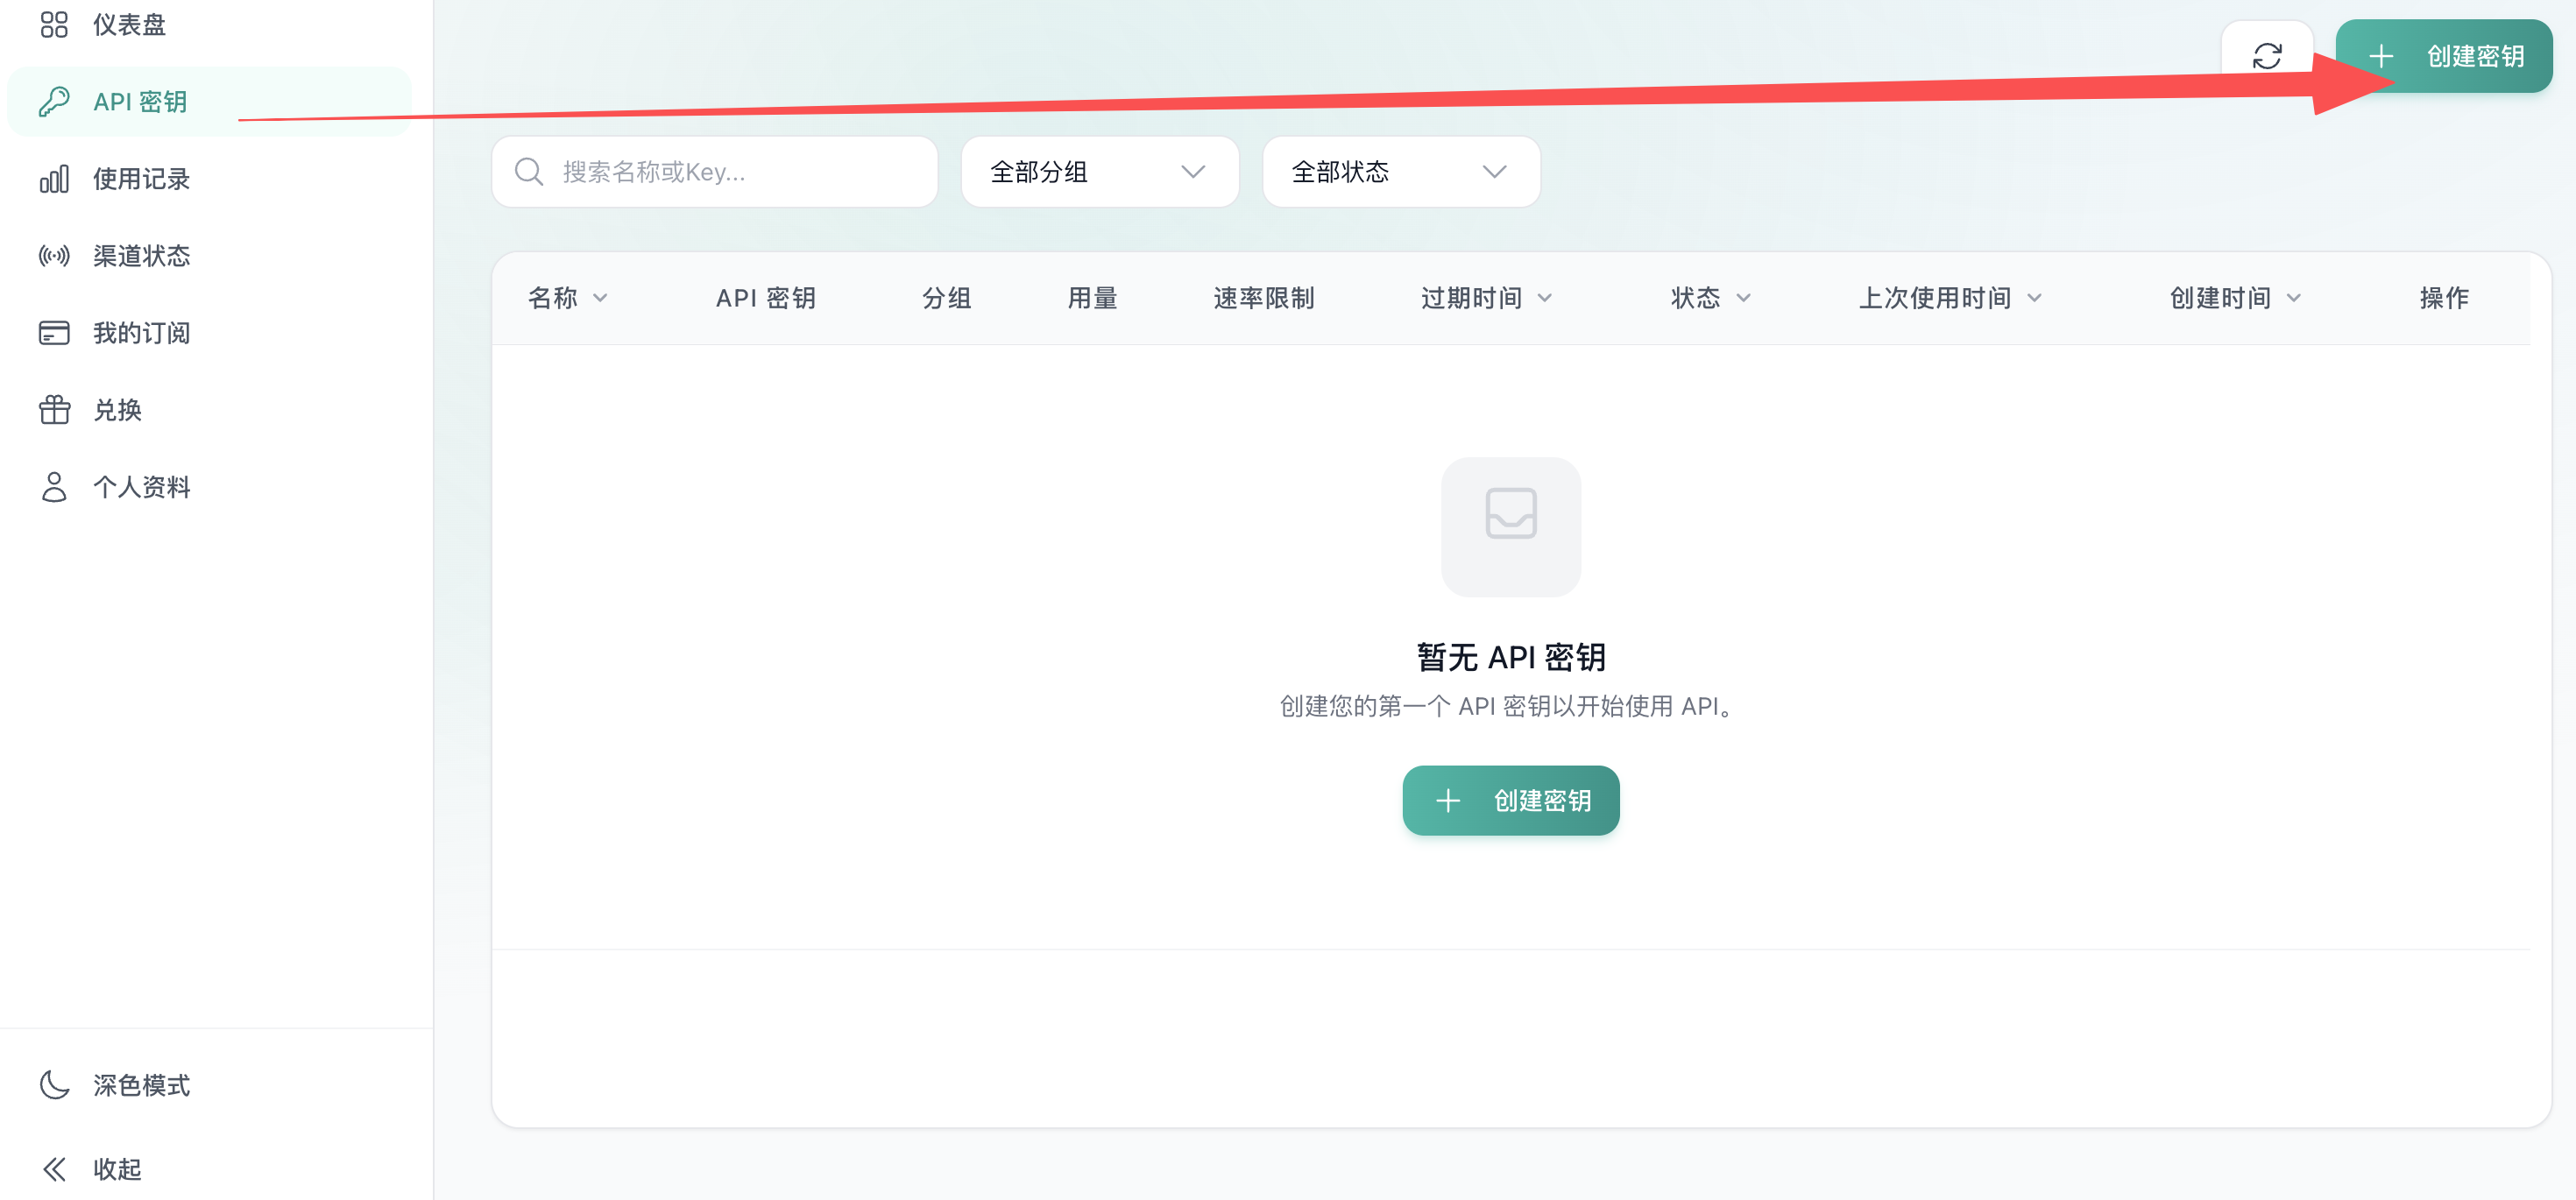
Sign in to OriginCoder and open the API key page in the console.
- Click API Keys in the left sidebar.
- Click the Create Key button at the top right.
Step 2: fill in the key details
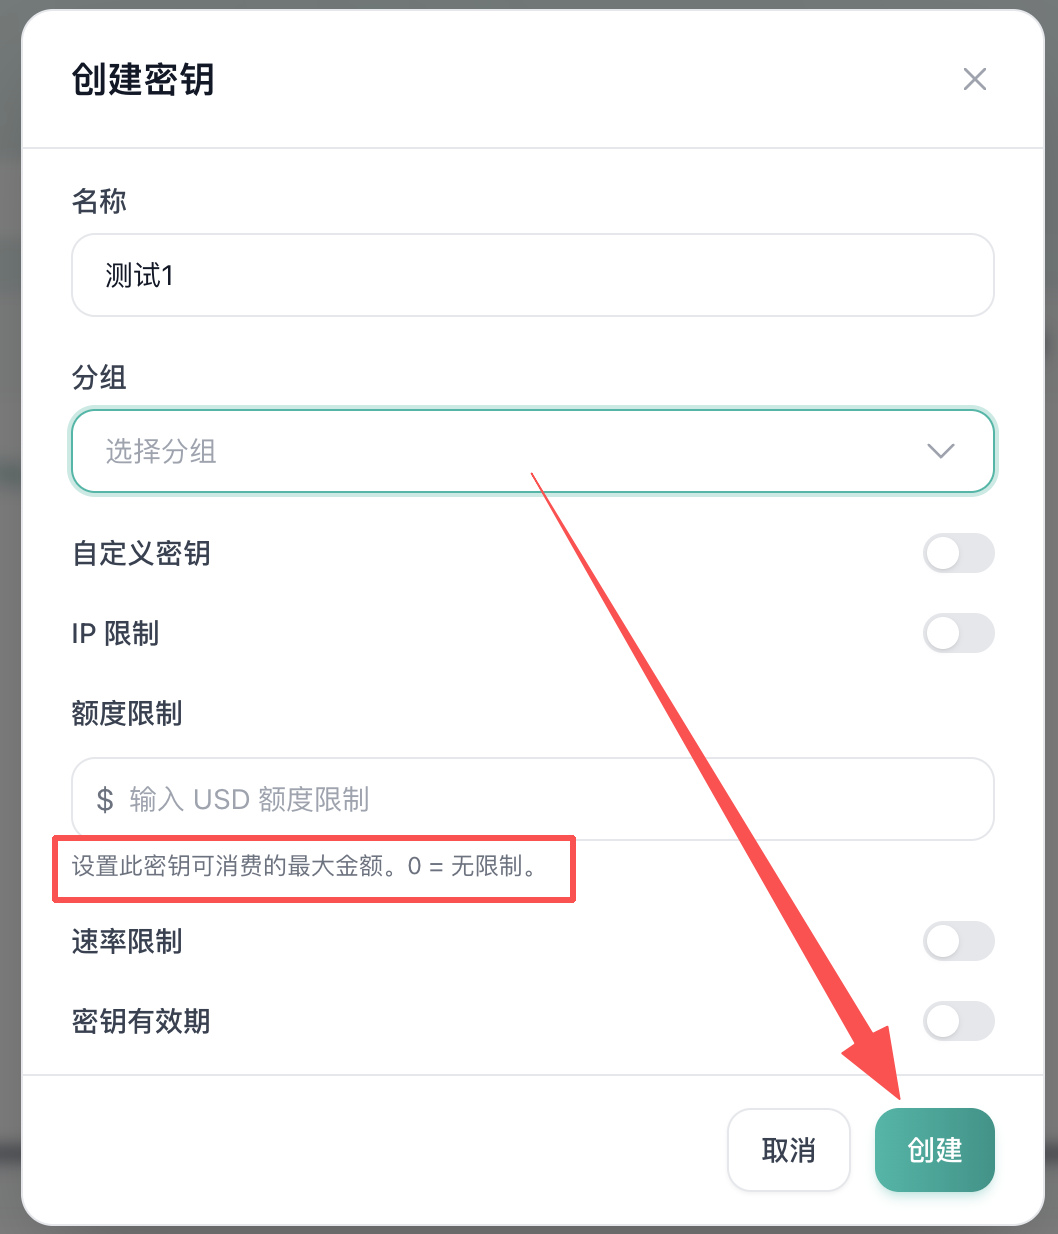
In the create-key dialog:
- Name: pick any name that helps you recognize the key.
- Group: choose the group that fits what you will use it for. The group decides which models the key can call and at what rate.
- Click Create at the bottom right. Your key is ready.
Tips:
- Enter
0as the quota limit for no limit. - If you need them, you can turn on IP restrictions, rate limits and other safety options.
Step 3: use it in a third-party tool
If the tool supports a custom API service, you only need two things: the API endpoint (Base URL) and the API key.
Claude URL: https://origincoder.com
GPT URL:    https://origincoder.com/v1
API_KEY:    the API key you created on OriginCoder
- Pick the address that matches the protocol the tool uses: the Claude URL for the Anthropic protocol, the GPT URL for the OpenAI protocol.
- Copy the API key you just created.
- Paste the address and key into the matching fields of the tool.
If you want to use Claude Code, you can skip the manual setup and follow the CC Switch steps below.
Step 4: download CC Switch
To use OriginCoder in Claude Code, we recommend installing CC Switch first. It is a desktop app that manages provider profiles for Claude Code, Codex and similar tools.
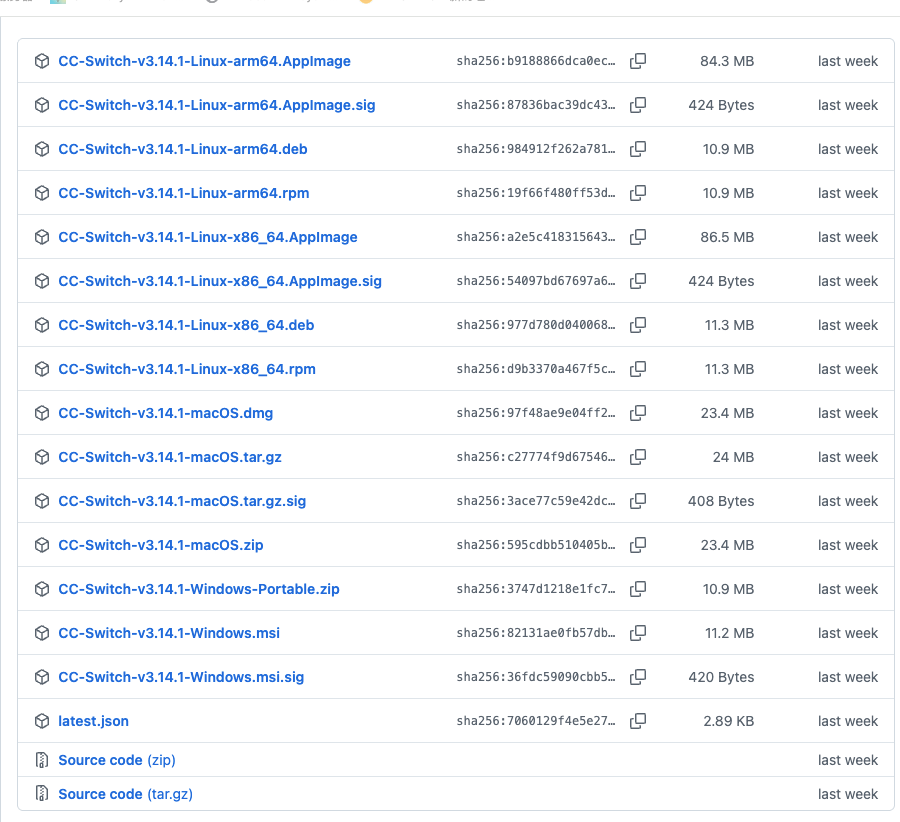
- Open the CC Switch releases page on GitHub.
- Download the build for your system and install it. Windows, macOS and Linux are supported.
If you cannot reach GitHub, contact OriginCoder support for an installer. Contact details are at the end of this guide.
Step 5: import into CC Switch
Once CC Switch is installed, you can import the profile straight from the OriginCoder console.
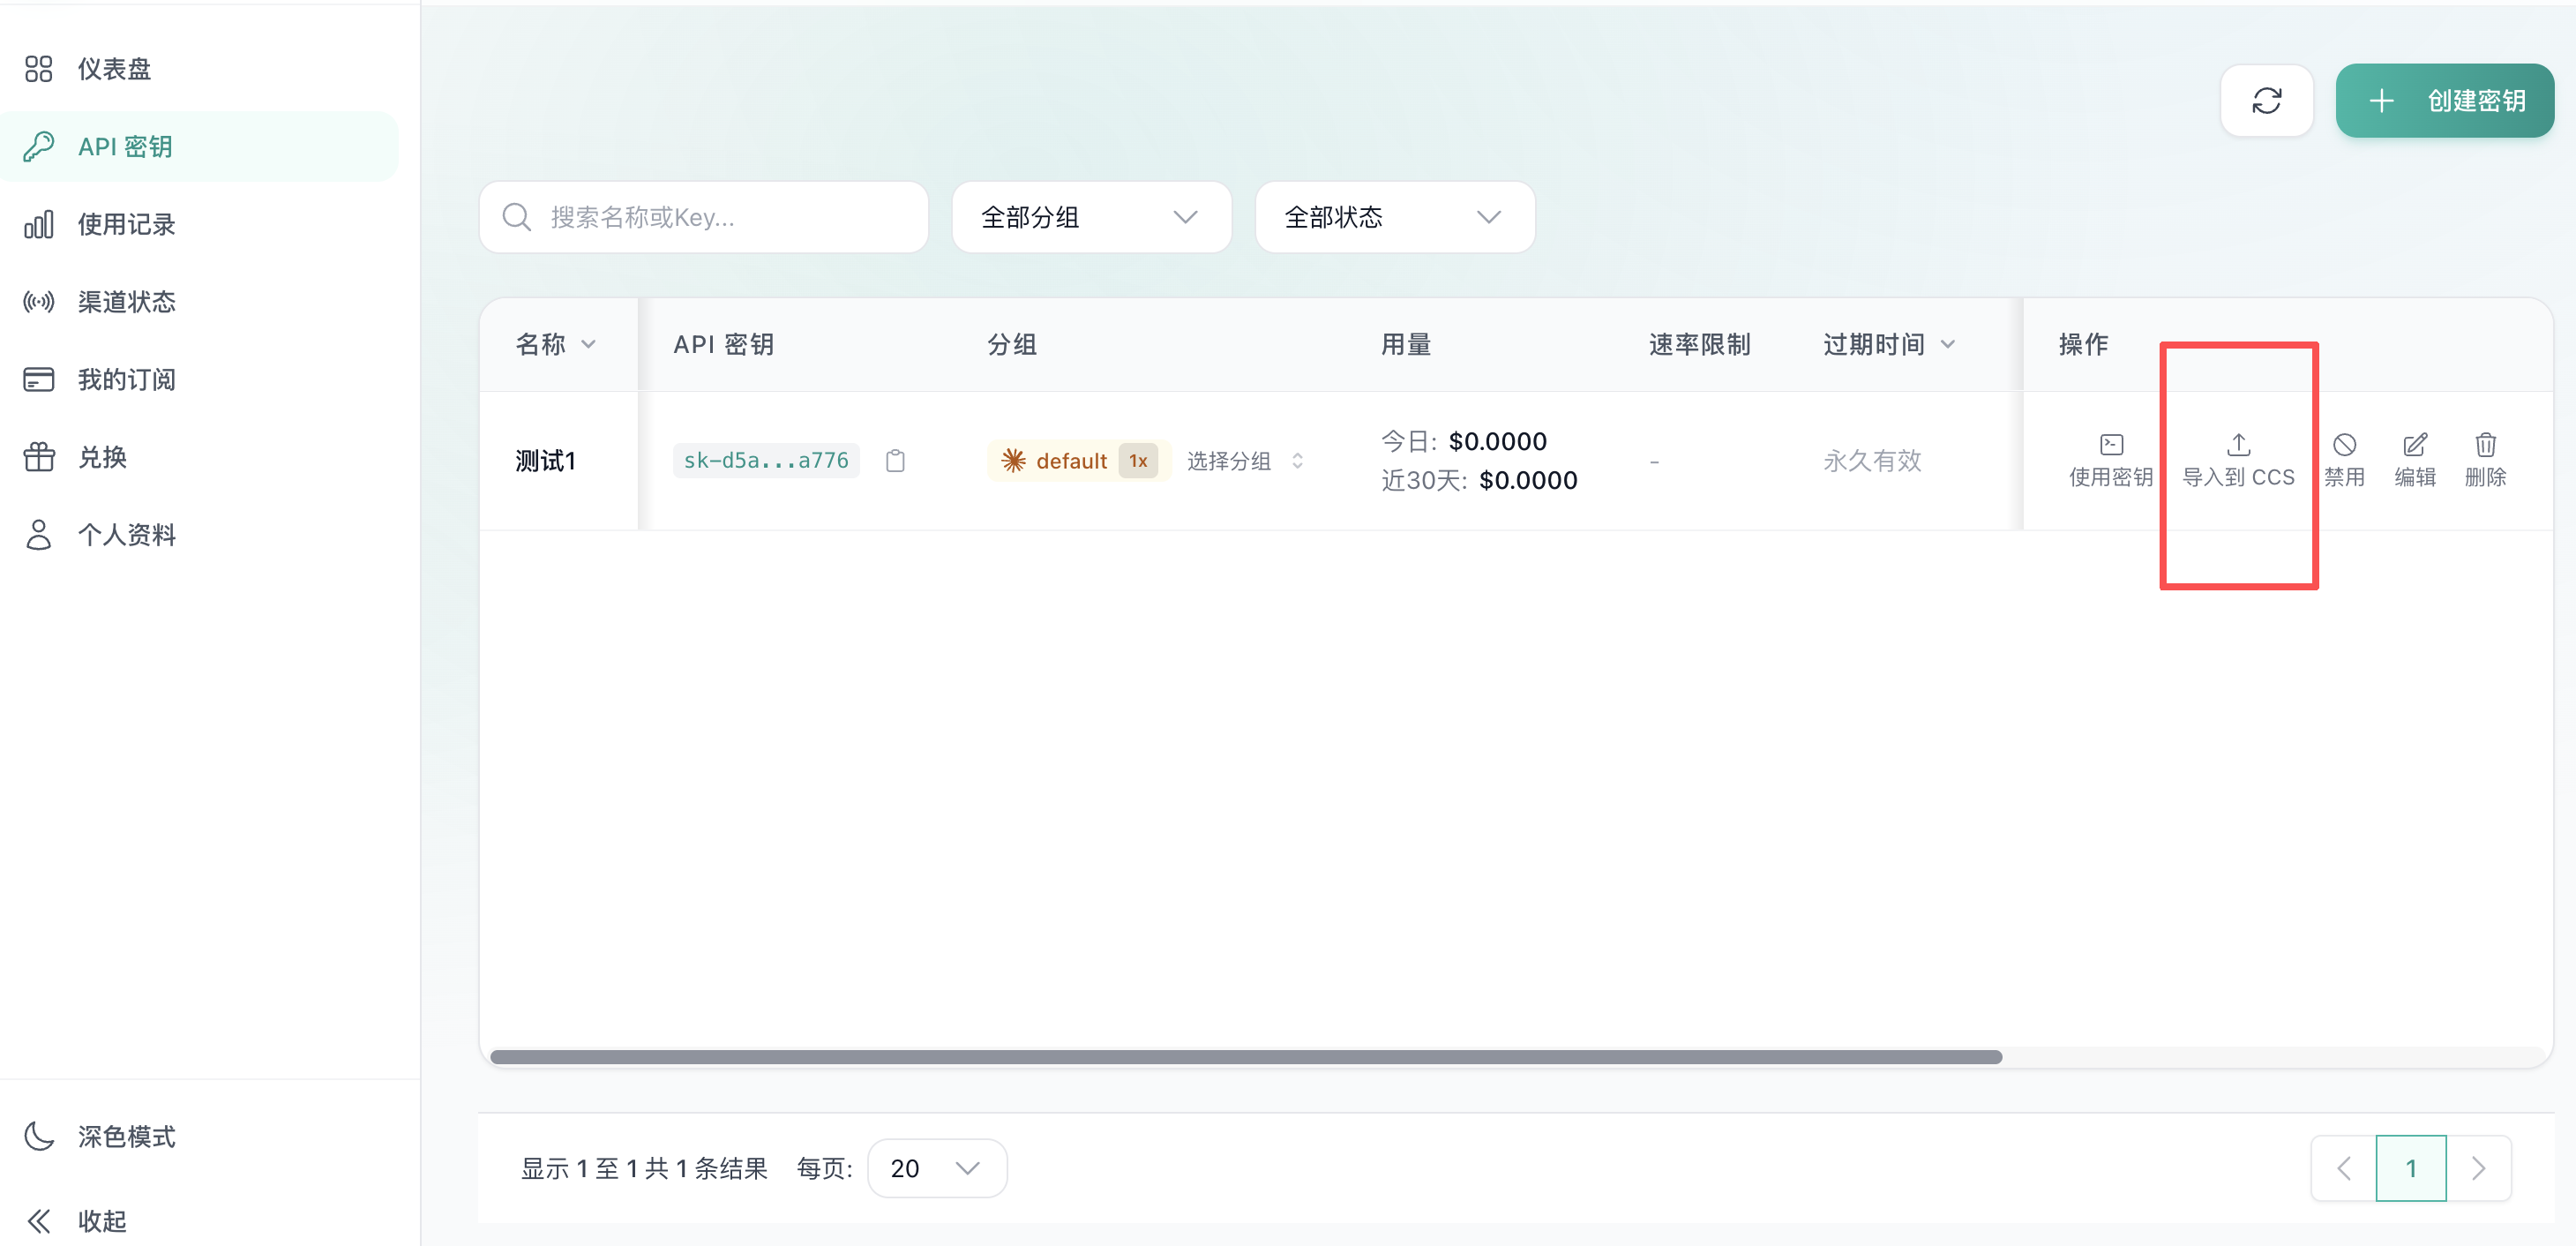
- Go back to your API key list on OriginCoder.
- In the actions column of the key, click Import to CCS.
- When the browser asks whether to open CC Switch, click Open CC Switch.
- Check the provider details in the CC Switch window.
- If everything looks right, click Import.
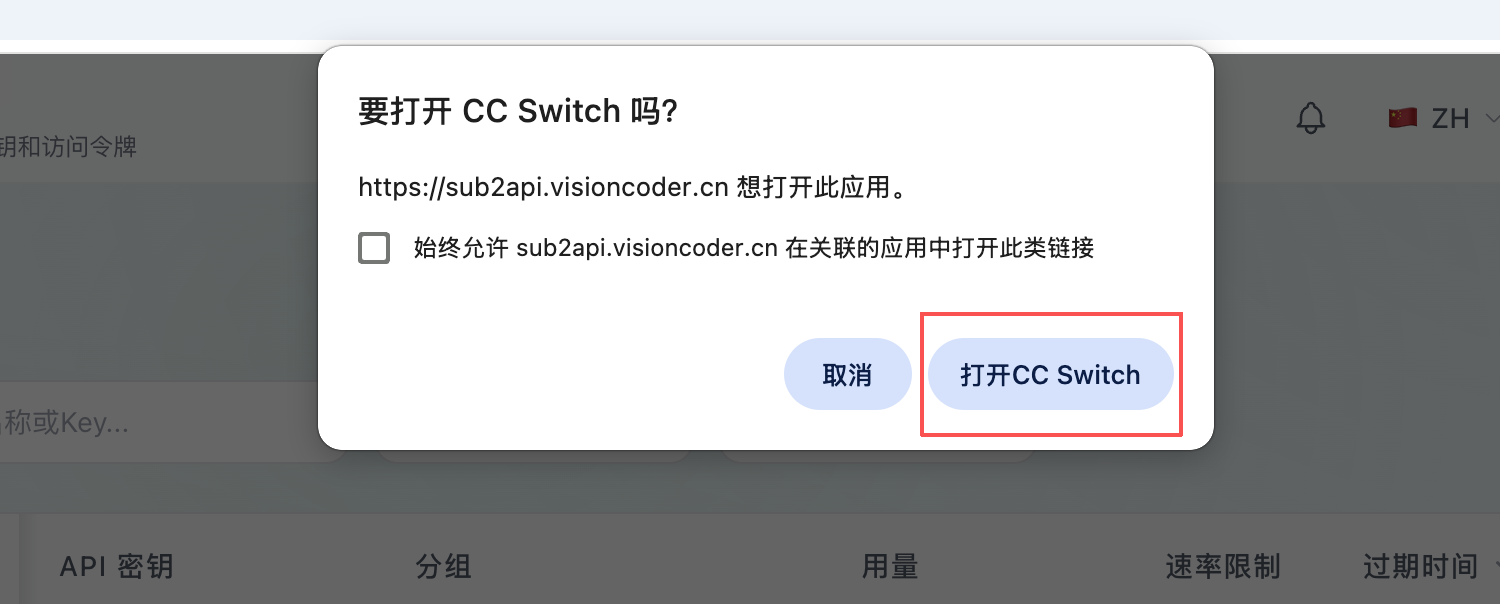
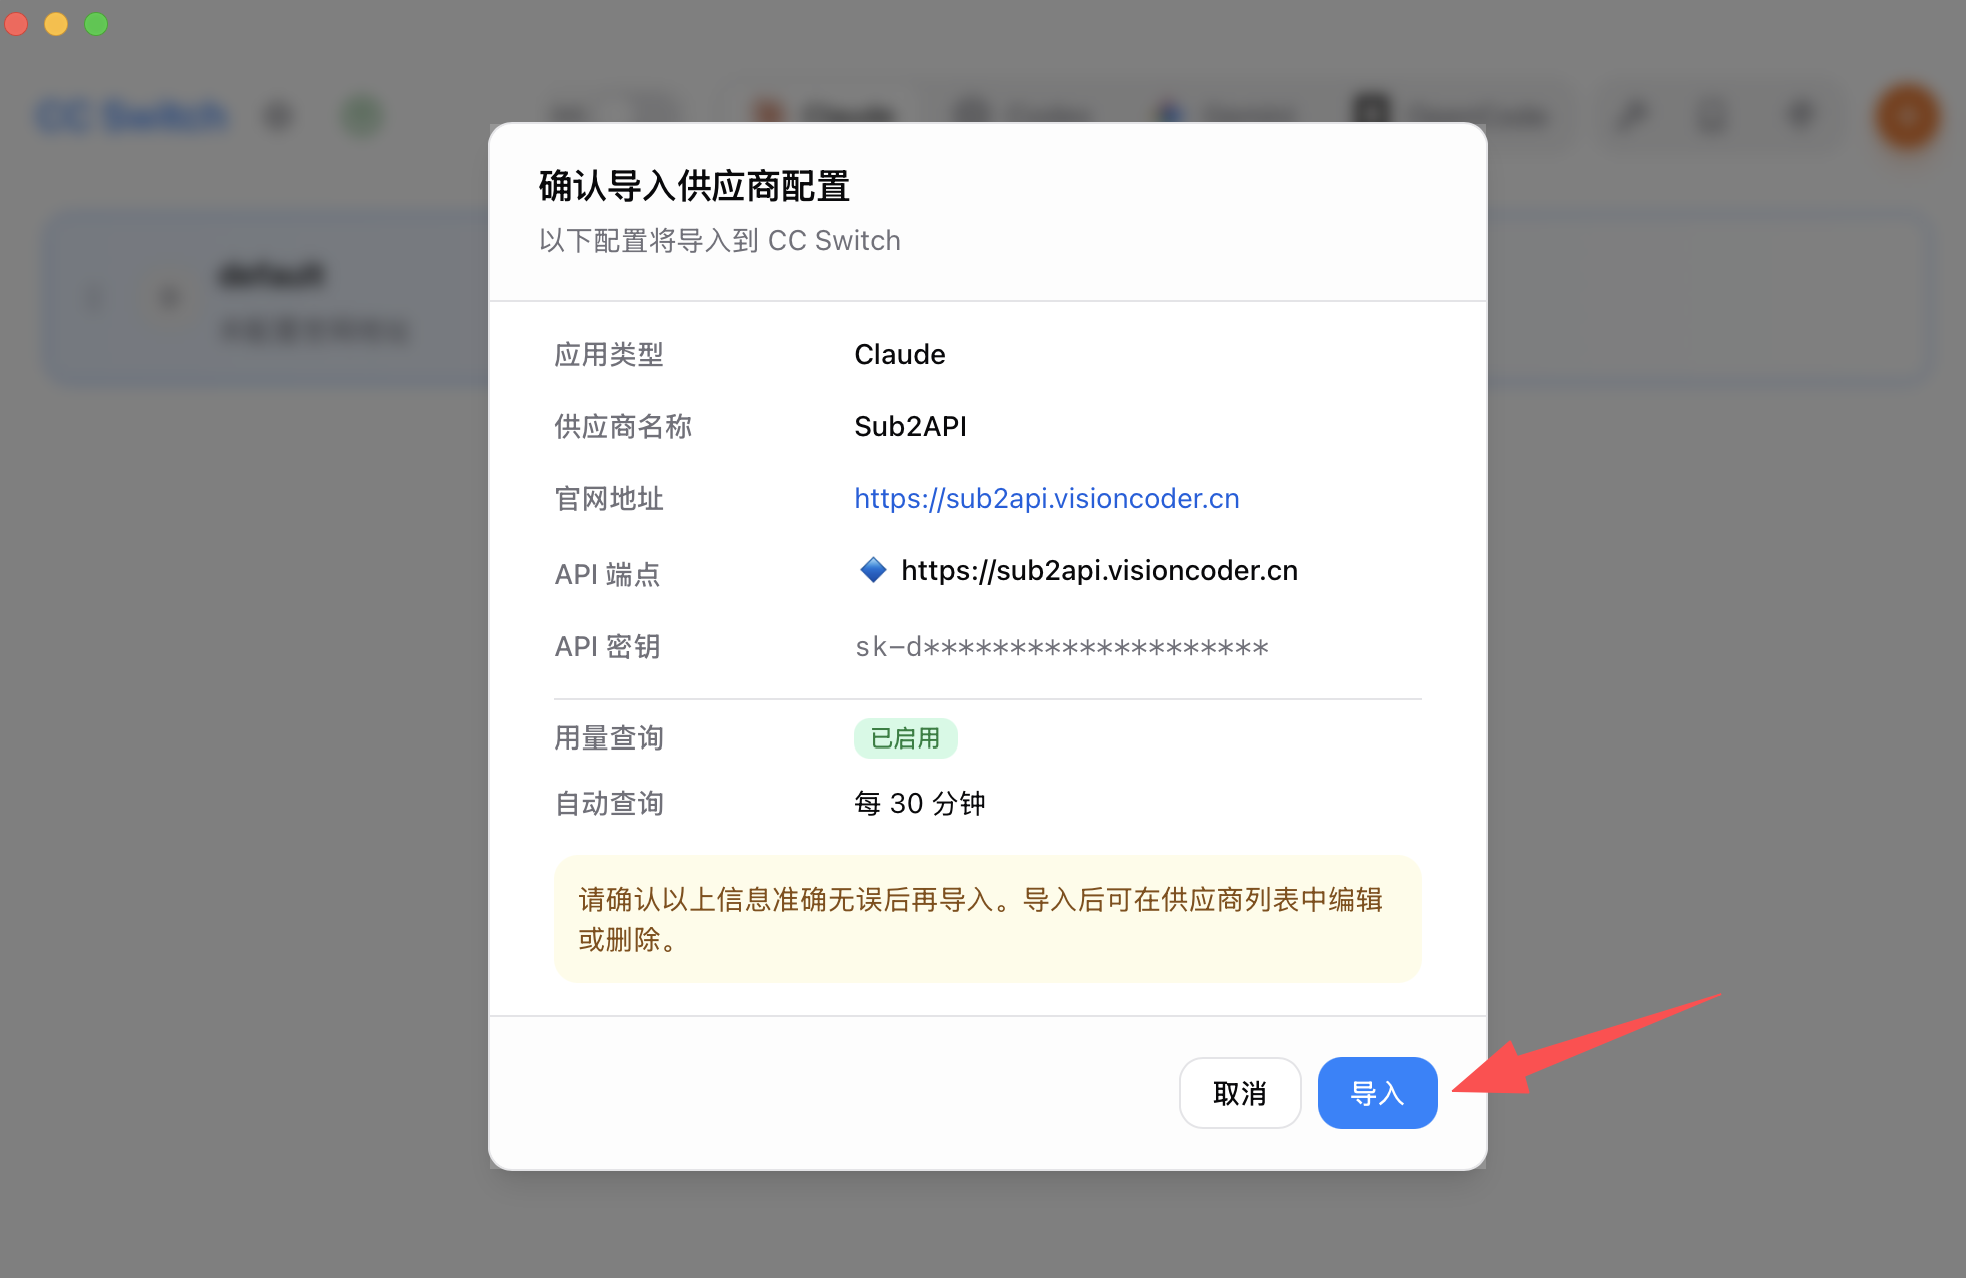
The domain shown in these screenshots is only an example. What gets imported depends on your own console.
Step 6: enable it and start using it
After the import, you still need to enable the profile in CC Switch.
- Open the CC Switch main window.
- Find the OriginCoder profile you just imported.
- Click Enable.
- Restart Claude Code.
After the restart, Claude Code works through OriginCoder.
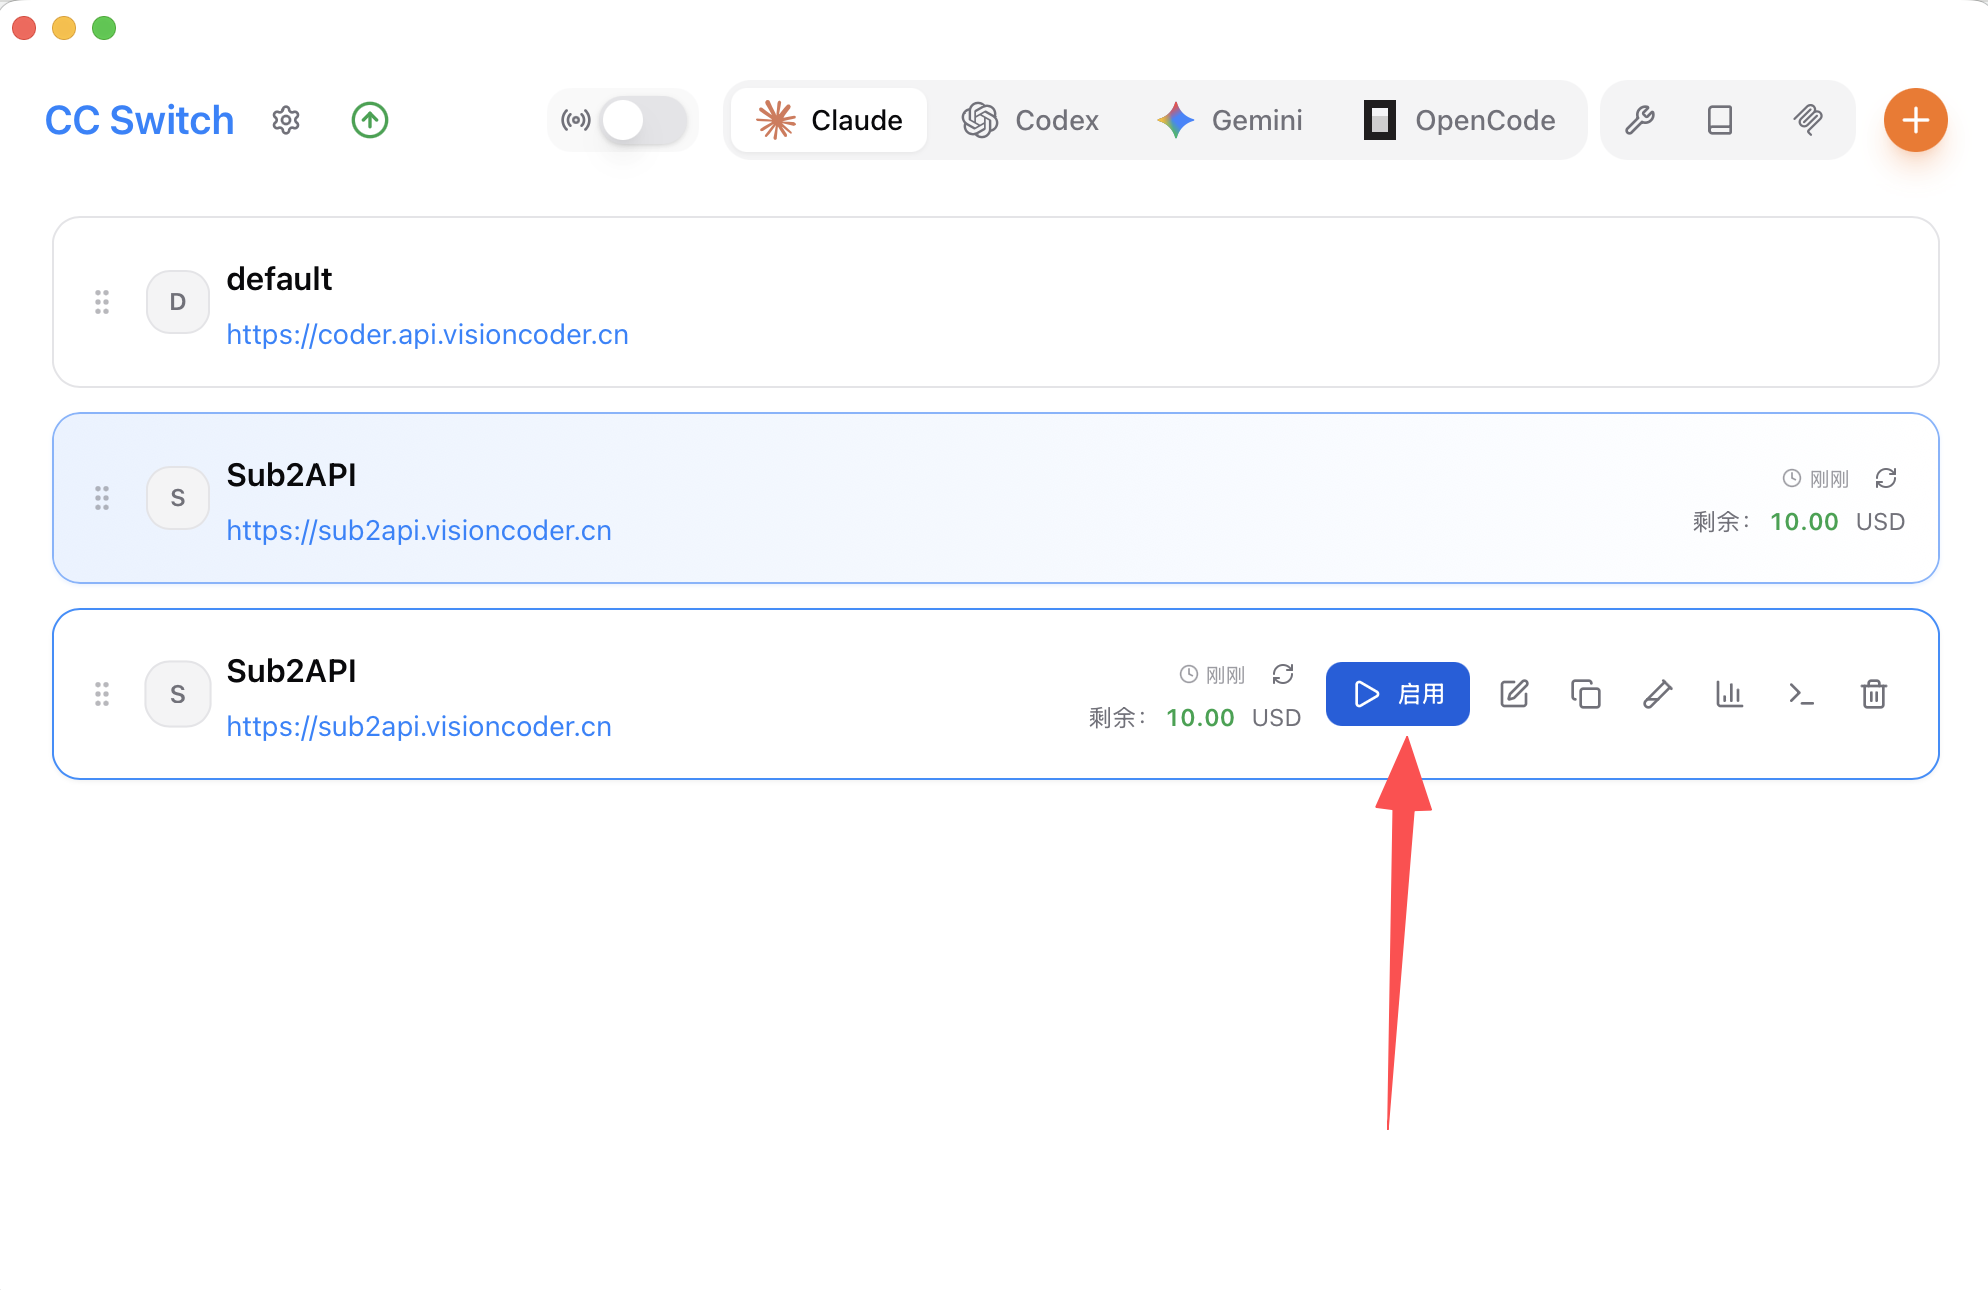
Default API endpoint
https://origincoder.com
If something goes wrong
Reach technical support any time:
- QQ: 1933254433
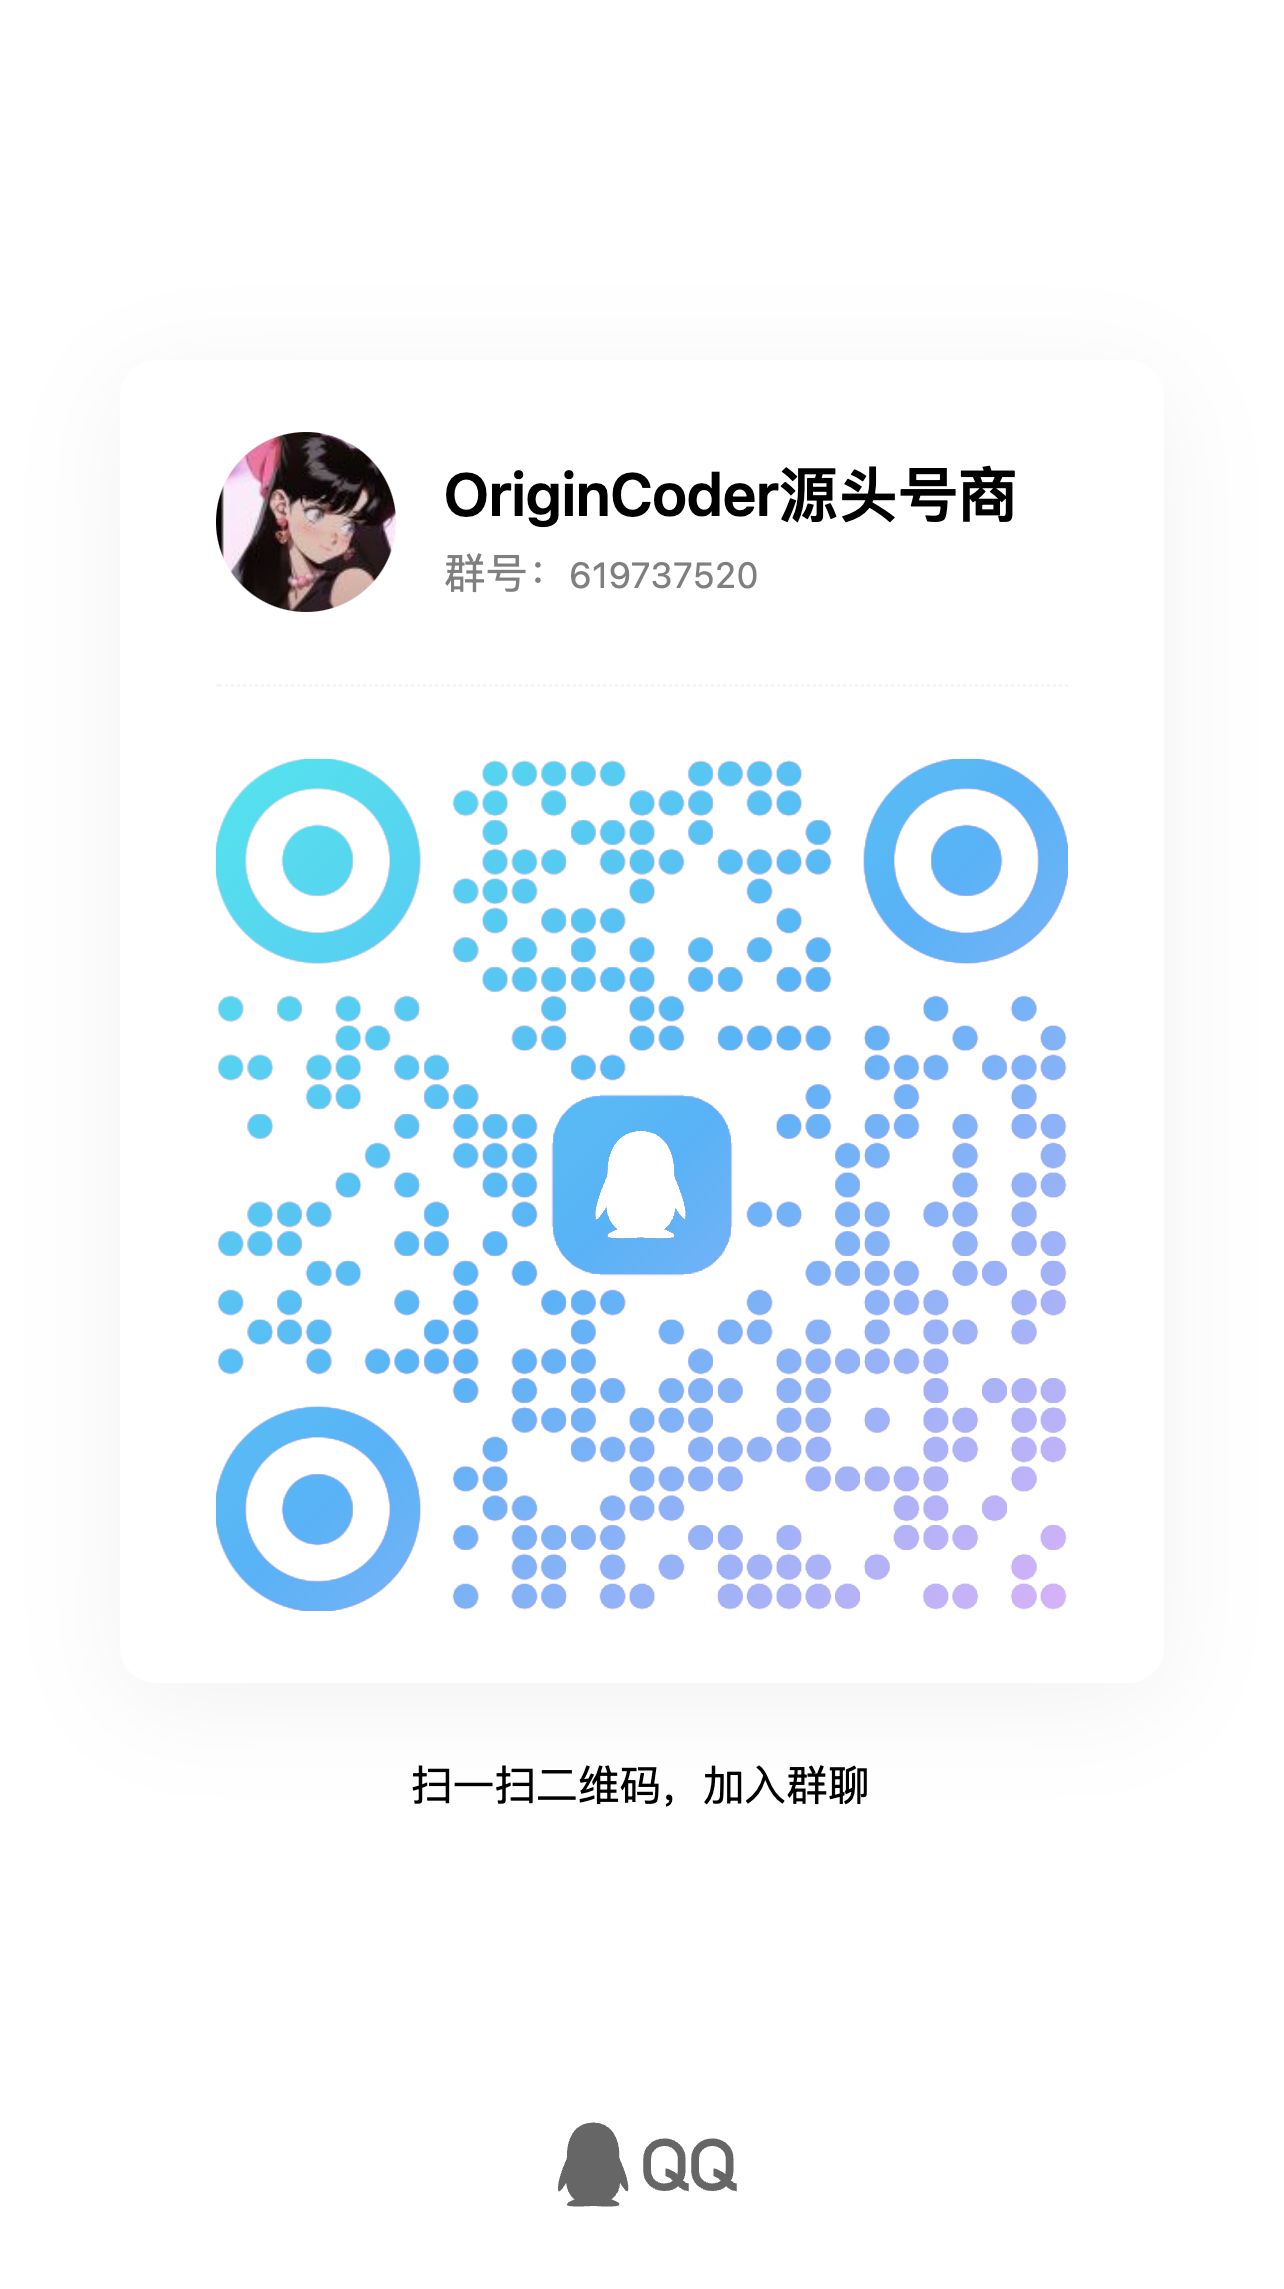
- QQ support group: scan the QR code below to join.
With these steps done, you can use OriginCoder in Claude Code or any other tool that supports a custom API. To go further, read How to use Claude Code with a custom API endpoint and How to use Codex CLI with a custom API endpoint.